This model of router I used: http://www.tp-link.us/products/details/?categoryid=218&model=TL-MR3020
Using firmware from OpenWrt: http://wiki.openwrt.org/toh/tp-link/tl-mr3020
First, thanks to folks at minipwner.com for putting together a step by step how to on building ones own minipwner! Also thanks to the many folks of the OpenWrt.org project!
Perhaps you have heard of the minipwner or the similar Pwnie Express teams pwn plugs. If not then in a brief statement know that these are devices that allow remote access to a network via wireless connectivity. From a pentester's or attacker's point of view they are a small, easy to disguise, effective means to infiltrate a network. These devices can be loaded with tools that once one connects to a network can be used for reconnaissance and attack. Examples of this can be read about here:
MintyPwner - pwner in an Altoids tin box
Wired Article interview with Jayson Street
My Experience With the Build
Let me make it clear I used the step by step instructions from MiniPwner web site. But as is typical with technology I ran into a few nuances with my build. Below will be excerpts from the MINIPWNER site but I have made modifications based on what I experienced.
I purchased my router from a local computer store for around $40. I went with the TP-Link TL-MR3020 because that is what they had in stock.

I used version 1.7 of the the device. At the time of this writing OpenWrt did note that their firmware worked with this version of the router but had not signed off on the upgrade of its firmware via the the web interface of the router; however it did work just fine.

For my USB I used a 4GB Cruzer.

MiniPwner Files : these are configuration files created by the MiniPwner team.
OpenWrt SquashFS factory bin file : this is the base firmware from OpenWrt.
OpenWrt SquashFS sysupgrade file : this is the upgrade to the base firmware file. I had many issues my first go around with the project and ended up installing this to fix those issues. My second build of the MiniPwner I upgraded the firmware as soon as I was able to connect to the OpenWrt version of the router and the remainder of the project went without incident.
I have these stored on my website to help maintain consistency with this write up.
I also used Backtrack 5 R2 as my OS for this project. This is a standalone install not a VM.
The below steps will written with the above described environment in mind.
Alright, let's step into it.
Working from Backtrack 5 R2 with an internet connection.
1. Download the files I have linked to above. Again, these files reside on my website's server they are not links to the original authors' websites. I did this to help maintain consistency with the files I will be working with. I downloaded the files into my /root/home directory. Use GParted to create the partitions on the USB Stick.
2. You will need to partition a USB drive so that it has a swap space partition and an EXT4 partition. I will be creating a separate detailed write up on how to do this with Backtrack 5 R2. From a command prompt within Backtrack type the command apt-get install gparted.
3. Insert the USB drive into the TP-Link router.
4. Plug the TP-Link router into a power source.
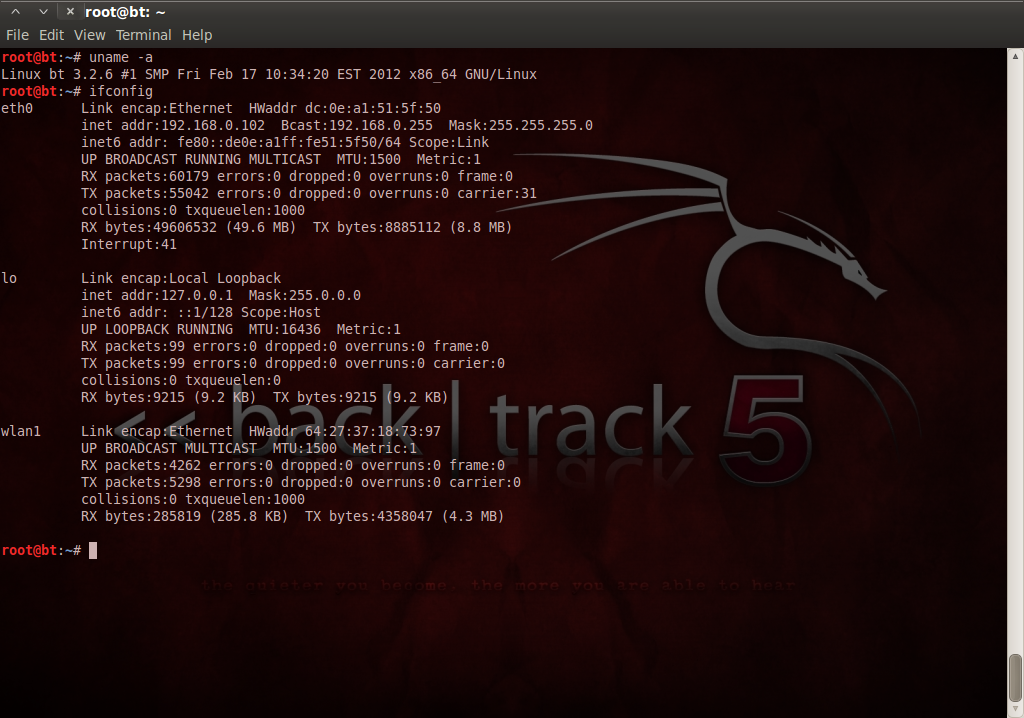
5. Connect the TP-Link router to the computer running Backtrack via an ethernet cable. Determine if you if you acquired an IP address. I used ifconfig from the command line. I did not acquire one so used dhclient eth0 to retrieve and IP.
6. The IP of the TP-Link router is 192.168.0.254. This can be confirmed by typing the command route -n from the command line in Bactrack. This particular router is in English so the interface is different from the that shown at MiniPwner.com. If it prompts for a username and password try admin and admin


Click the upgrade button. The status bar will go through to 100% TWICE and then it will reboot.
You will, of course, lose connectivity to the device.

Video capture of the end of the upgrade process
9. Now that this process is complete Backtrack NIC has to have a new IP addressed assigned. Sticking close to the MiniPwner instructions apply 192.168.1.111 by using the command line and typing the command:
ifconfig eth0 192.168.1.111 netmask 255.255.255.0

10. Now connectivity to the router should be established. This can be tested by telnetting to the router. From the command line type:
telnet 192.168.1.1

Leave this window open.
11. The next task is to upgrade the firmware. As mentioned earlier this alleviated many issues that occurred with my first MiniPwner install. In Backtrack open a new command prompt and navigate to the directory containing the openwrt-ar71xx-generic-tl-mr3020-v1-squashfs-sysupgrade.bin file. Then at the command prompt type:
nc -l -p 3333 < openwrt-ar71xx-generic-tl-mr3020-v1-squashfs-sysupgrade.bin
Hit the Enter key on the keyboard.
Return to the OpenWrt telnet session window and type:
cd /tmp
then type the command
nc 192.168.1.111 3333 > sysupgrade.bin
Wait for about 10 seconds then hit ctrl+C to cancel. If successful an ls command should the appropriate sized file. See the picture below for an example of what this should look like.

sysupgrade sysupgrade.bin
Hit enter, and wait for the system router to reboot.
Here is a video capture of my experience.
13. Once the router reboots, telnet back into the router from a command line Backtrack:
Telnet 192.168.1.1
From here on out you should be good to go with the remainder of the instructions from the minipwner.com site except there is one command in step 19 that does not apply to this build:
cp -f /etc/config/fstab /etc/config/fstab.orig
There is not fstab in the /etc directory of this version of the TP-Link router. So the rest of the instructions I have just copied and pasted from minipwner.com.
Have fun, good luck, and check their forums if you run into issues. They helped me tremendously.
- *** If you mess up anything
after this point, enter the command "firstboot" into your telnet
session, reboot, and you will be right back here.***
- If you aren't good with vi for
editing, consider doing "opkg install nano" to get a more
friendly editor.
- Copy and paste the following
commands into your telnet session.
cd /usr/share
nc 192.168.1.111 3333
> minipwner.tar
- It will hang up while
transfering the tar archive from the PC. (netcat doesn't know that the
file transfer is done) Wait 10 seconds then go to the command prompt
window on the PC and Ctrl-C to break the connection
- Paste this command into your
telnet session:
tar -xf minipwner.tar
- Paste these commands into your
telnet session:
cd
/usr/share/minipwner
cp -f
/etc/config/network /etc/config/network.orig
cp -f
/etc/config/wireless /etc/config/wireless.orig
cp -f
/etc/config/firewall /etc/config/firewall.orig
cp -f /etc/profile
/etc/profile.orig
cp -f /etc/opkg.conf
/etc/opkg.conf.orig
cp -f
/etc/config/system /etc/config/system.orig
cp -f /etc/config/dhcp
/etc/config/dhcp.orig
cp -f ./network.1
/etc/config/network
cp -f ./wireless.1
/etc/config/wireless
cp -f firewall.1
/etc/config/firewall
cat
/etc/config/wireless.orig
- Your original
/etc/config/wireless file contents should have been displayed on the
screen. Copy the MAC address of your wireless adapter from the screen.
- Edit etc/config/wireless using
vi
/etc/config/wireless
Delete the bad MAC address (cursor to it and use x to delete) then paste in the copied MAC (i to insert then paste). Then change the Wifi settings to connect to your wireless router (by default tries to connect to SSID "TOKI". Shift-ZZ to save and exit. :q! to exit without saving.
- Paste these commands into your
telnet session:
/etc/init.d/network
restart
wifi
- Type
ifconfig wlan0
to check that your wireless settings came up.
If you don't have a DHCP assigned address you'll need to troubleshoot your
settings.
- If your internet connection
works you should be able to run "opkg update" and see that it
connects and updates packages.
Some people have challenges at this step. One
common problem is that their wireless network is in the range 192.168.1.x,
which is the same range as eth0. See the forum for options if this is your
problem (simple fix is to change the IP range of your wireless network)
- Paste these commands into your
telnet session:
cd
/usr/share/minipwner
opkg update
opkg install kernel
opkg install kmod-usb-storage
opkg install
kmod-fs-ext4
opkg install
block-mount
cp -f profile.1
/etc/profile
cp -f fstab.1
/etc/config/fstab
cp -f opkg.conf.1
/etc/opkg.conf
cp -f system.1
/etc/config/system
mkdir /mnt/usb
/etc/init.d/fstab
enable
/etc/init.d/fstab
start
ls /mnt/usb
- Check that your USB drive
mounted. "mount" or "df" commands should show it. If
not, you'll need to troubleshoot USB access.
- Paste these commands into your
telnet session:
cd
/usr/share/minipwner
ln -s /mnt/usb /opt
ln -s /etc
/mnt/usb/etc
opkg update
opkg install netcat
opkg -dest usb install
tar
opkg -dest usb install
openssh-sftp-client
opkg -dest usb install
nmap
opkg -dest usb install
tcpdump
opkg -dest usb install
aircrack-ng
opkg -dest usb install
kismet-client
opkg -dest usb install
kismet-server
opkg -dest usb install
perl
opkg -dest usb install
openvpn
opkg -dest usb install
dsniff
opkg -dest usb install
nbtscan
opkg -dest usb install
snort
opkg -dest usb install
karma
opkg -dest usb install
samba36-client
opkg -dest usb install
elinks
opkg -dest usb install
yafc
cp -f ./network.2
/etc/config/network
cp -f ./wireless.2
/etc/config/wireless
cp -f ./dhcp.2
/etc/config/dhcp
ln -s
/mnt/usb/usr/share/nmap /usr/share/nmap
cat
/etc/config/wireless.orig
- Your original
/etc/config/wireless file contents should have been displayed on the
screen. Copy the MAC address of your wireless adapter from the screen.
- Edit etc/config/wireless using
vi etc/config/wireless
Delete the bad MAC address (cursor to it and use x to delete) then paste in the copied MAC (i to insert then paste). Shift-ZZ to save and exit. :q! to exit without saving.
- Type passwd to set a root
password.
- Reboot. The default
configuration for the minipwner is acting as a wireless access point with
an SSID of TLINK and a router IP of 192.168.50.1, and running DHCP on the
ethernet port.
- If things get hosed up, see the "rebuilding"
section of the FAQ for instructions on using fail-safe mode to rebuild
your router.
- If you want to install other
packages to the USB key, do opkg -dest usb install
. I have had problems where installed libraries, modules, or other resources are not found because they are not in the "normal" place. In a lot of cases you can kinda fix this by creating a symlink, similar to the one above for "
ln -s
/mnt/usb/usr/share/nmap /usr/share/nmap"
.

hey i just came across a start up for a power supply for the mini pwn .. thought i should share it with you ...
ReplyDeletehttp://www.indiegogo.com/projects/sofa-portable-power-bank-specifically-designed-for-tp-link-wireless-mini-router
Thanks for sharing this info! I am new to OpenWRT and recently picked up a MR3020 to use. This post is really, really helpful.
ReplyDelete